Are you searching for a comprehensive, easy-to-follow guide on how to start your very own blog?
This step-by-step tutorial is designed to help you create a blog in just 20 minutes, even if you have only the most basic computer skills. By the end of this guide, you’ll have a fully functional, beautifully designed blog that’s ready to be shared with the world.
Perfect for beginners, this guide takes you through every stage of the process, with clear instructions, detailed images, and helpful videos to ensure everything is easy to understand.
If you run into any challenges or have questions along the way, don’t worry! You can always reach out to me, and I’ll be happy to provide personalized assistance to get you back on track.
With this beginner-friendly guide, launching your blog has never been easier. Let’s get started on turning your blogging dream into reality!
How to Start a Blog in 5 Easy Steps:
These are the 6 main steps that you need to follow to start a blog.
1. Choose a blog topic and niche. Select a descriptive short domain name.
2. Select a reliable web hosting provider and install WordPress. Get your blog online.
3. Set up your blog and customize its design using AI & ChatGPT
4. Write your first blog post and publish it. Share your content with the world.
5. Promote your blog and grow your audience Get flooded by visitors.
Disclosure: This guide to starting your own blog contains some affiliate links. If you purchase any service through one of these links I may earn a small commission, this is at no extra cost to you.
Wondering if you should start a blog? Here’s why starting a blog could be the perfect decision for you!
Blogging offers numerous benefits, whether you’re looking to share your passion, build an online presence, or even make money. If you’re passionate about a topic, enjoy writing, or want to connect with like-minded people, a blog provides the perfect platform to express yourself and build a community.
Reasons to Start a Blog:
- Share Your Expertise: Whether it’s travel, fashion, tech, or personal growth, blogging allows you to share your knowledge and experiences with others.
- Build a Personal Brand: A blog can showcase your skills and talents, helping you build a professional portfolio and online reputation.
- Monetize Your Passion: Many bloggers earn money through ads, affiliate marketing, sponsored posts, or selling their own products and services.
- Connect with Others: Blogging helps you engage with a community that shares your interests, offering opportunities for networking and collaboration.
- Improve Your Writing and Communication Skills: Blogging regularly hones your ability to communicate effectively, which is valuable in both personal and professional settings.
- Create a Long-Term Asset: A well-established blog can continue to attract traffic and generate income for years to come.
If any of these reasons resonate with you, starting a blog could be the perfect next step in your personal or professional journey. Whether you’re looking to grow an online presence, express creativity, or tap into a new income stream, blogging offers a wide range of opportunities. So, should you start a blog? Absolutely!
What is actually a blog?
| A blog is an online platform where individuals or organizations regularly publish content, known as blog posts, on specific topics or interests. The term “blog” is short for “weblog,” which originally referred to a form of an online diary or journal. Today, blogs have evolved into versatile content platforms covering a wide range of subjects, from personal experiences and hobbies to business, technology, news, and education. Key Features of a Blog: Regularly Updated Content: Blogs typically feature frequently updated posts in a chronological order, with the newest content appearing at the top. Posts on Specific Topics: Each post focuses on a particular subject, often related to the blog’s niche (e.g., travel, cooking, personal finance). Engagement through Comments: Most blogs allow readers to comment on posts, fostering engagement and discussions with the audience. Informal or Conversational Tone: Blog writing is often more personal and conversational compared to traditional websites, making it easier to connect with readers. Types of Blogs: Personal Blogs: Individuals share their thoughts, opinions, or life experiences (e.g., personal growth, travel diaries). Business Blogs: Companies use blogs to connect with customers, share industry insights, and promote products or services. Niche Blogs: Focused on specific topics like fitness, technology, food, or fashion, aiming to cater to a targeted audience. Professional Blogs: Written by experts or influencers to establish authority in their field and provide valuable advice or tutorials. In summary, a blog is a dynamic platform for sharing information, engaging with readers, and building an online presence around a particular topic. Blogs can serve various purposes, from personal expression to business promotion, and are widely used to connect with audiences on the internet. |  |
How to be a successful as a blogger?
Becoming a successful blogger requires more than just writing skills; it involves strategy, dedication, and connecting with your audience. Here’s a guide to help you succeed as a blogger:
1. Choose a Niche You’re Passionate About
- Pick a focused niche that you’re genuinely interested in. Passion for your topic keeps you motivated and helps you create authentic, engaging content that resonates with your audience.
2. Understand Your Target Audience
- Know who you’re writing for. Identify their needs, interests, and pain points to create content that offers real value. The more you connect with your readers, the more loyal they become.
3. Create High-Quality, Valuable Content
- Content is king. Focus on delivering well-researched, informative, and engaging posts that solve problems, answer questions, or inspire your readers. Consistently posting original, valuable content builds trust and authority.
4. Develop a Content Strategy
- Plan your posts with a content calendar to maintain consistency. Post regularly, but prioritize quality over quantity. This helps build a reliable readership and improves search engine rankings.
5. Optimize for SEO
- Search Engine Optimization (SEO) is essential for driving organic traffic. Use keyword research to target the right terms, optimize meta descriptions, headings, and ensure your site loads quickly. SEO helps increase your blog’s visibility in search engines.
6. Engage with Your Audience
- Respond to comments, emails, and social media interactions to build relationships with your readers. Engaging with your audience makes them feel valued and helps build a community around your blog.
7. Promote Your Blog
- Utilize social media, email marketing, and collaborations to promote your blog. Share your posts across platforms like Instagram, Twitter, Pinterest, and LinkedIn to attract a wider audience. Guest blogging on other sites can also boost visibility.
8. Monetize Your Blog
- Once you’ve built a solid readership, explore monetization options like affiliate marketing, sponsored posts, advertising, or selling digital products and services. Choose methods that align with your blog’s values and audience.
9. Be Consistent and Patient
- Consistency is key to building an audience and growing your blog. It may take time to see significant results, so stay patient and committed. The more consistent you are, the more trust and authority you build over time.
10. Keep Learning and Improving
- Blogging trends, SEO practices, and content strategies evolve. Stay updated with industry trends, analytics, and blogging tools to continuously improve your blog’s performance.
By following these steps and staying dedicated, you can build a successful blog that attracts readers, grows your online presence, and potentially generates income.
Disclosure: This guide to starting your own blog contains some affiliate links. If you purchase any service through one of these links I may earn a small commission, this is at no extra cost to you.
So if you are ready to learn how to start a blog without further ado, let’s jump into step 1.
Step1: Choose your blog domain name
[su_highlight background=”#FFF47D”]Click here to start![/su_highlight]
Choosing the right blog name is crucial, as it will represent your brand and be the first thing people notice. Here’s how to select a blog name that’s memorable, meaningful, and SEO-friendly:
Tips for Choosing a Blog Name:
- Reflect Your Niche or Passion: Your blog name should give readers an idea of the content you’ll cover. Choose words that reflect your niche, whether it’s travel, fitness, technology, or personal finance.
- Keep It Simple and Memorable: A short, easy-to-remember name is key to helping people find and recall your blog. Avoid complex words, unnecessary numbers, or symbols that could make it harder for people to type or spell.
- Use Keywords for SEO: If possible, include relevant keywords in your blog name to help with search engine optimization (SEO). For example, if your blog is about food recipes, terms like “food,” “kitchen,” or “recipes” could help with visibility.
- Consider Your Audience: Think about the tone and style of your blog and how it aligns with your target audience. If your blog is casual and fun, choose a name that reflects that personality. If it’s more professional or educational, opt for something that sounds credible and trustworthy.
- Check Availability: Before finalizing your blog name, ensure that the domain name (e.g., yourblogname.com) is available. You can use domain registration platforms like GoDaddy or Namecheap to check for availability. Also, check social media platforms to secure the same name for consistency across your online presence.
- Future-Proof Your Name: Choose a blog name that gives you room to expand. Avoid being too narrow in case you want to cover additional topics later on. For example, instead of “BestVeganDesserts.com,” you might go with “DeliciousVeganEats.com” if you plan to write about more than just desserts.
Examples:
- TravelogueAdventures – Perfect for a travel blog, this name gives readers a sense of excitement and exploration.
- MindfulMusings – Ideal for a lifestyle or wellness blog, suggesting thoughtful content about personal growth or mindfulness.
- TechTalkers – Great for a technology blog, straightforward and easy to remember.
Once you’ve chosen a name, you’ll be ready for the next step: securing your domain and setting up your blog!
Step 2: Get a web hosting
This step may seem to be a bit technical but the good news is, with the help of platforms like WordPress it is just a piece of cake. If you wanted to have a website a couple of years ago you needed to know HTML and CSS and other coding languages but today you just need to follow these steps and you have your website up and running in no time.
What is WordPress: WordPress is the most popular and simplest way to create your own blog or website. Over 34% of the websites that you see on the internet are powered by WordPress. Yes, that is 1 in every four websites that you visit.
It is an open-source content management system that enables everyone to build a website even without any coding skills.
In order to host a WordPress, the best web hosting that the official page of WordPress recommends is Bluehost and this the web hosting that we are going to use.
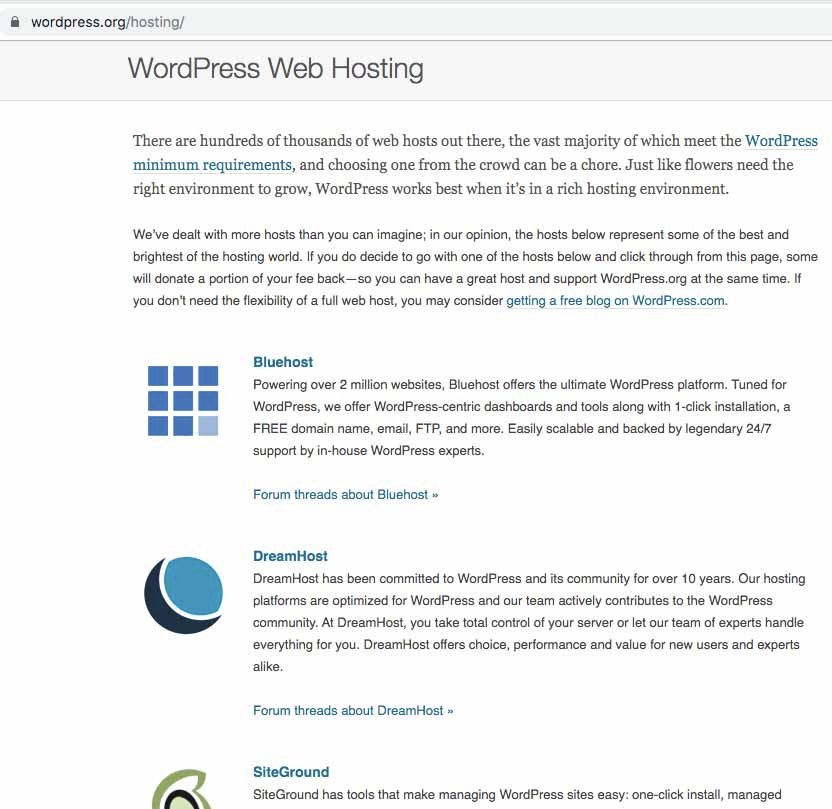
Now that you have picked your blog domain name it is time to get your blog online using Bluehost.
What you get with Bluehost:
- 30-day money-back guarantee if you were not satisfied.
- A free domain name as part of your package for the first year.
- 24/7 customer support through chat and phone.
- Simple one-click installation of WordPress.
- As we already mentioned it is the nest hosting prover recommended by WordPress official website since 2005.
- Free SSL which is mandatory for Google to rank a website higher in the search result.
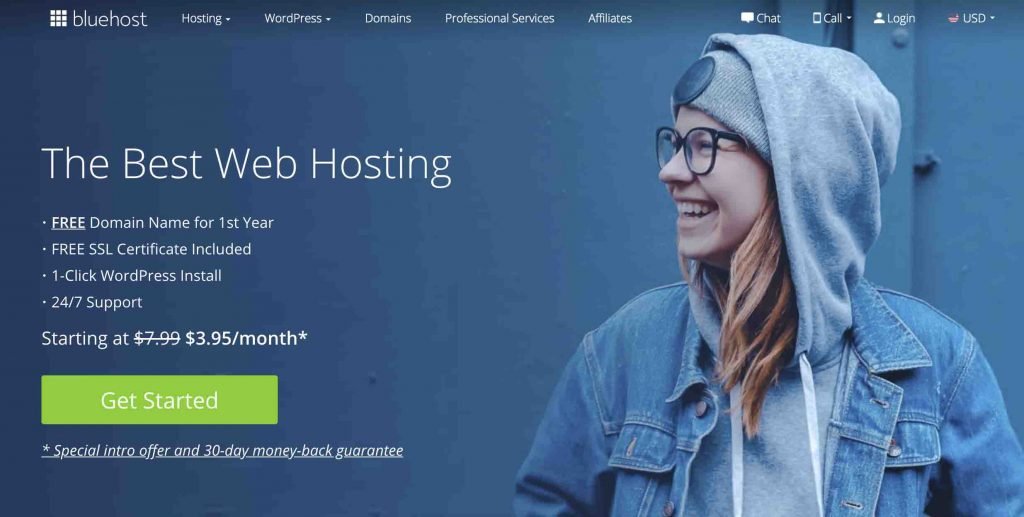
Let’s get your website online!
1. [su_highlight background=”#ead512″]Click here[/su_highlight] to head over to Bluehost and then click the green “Get Started” button.
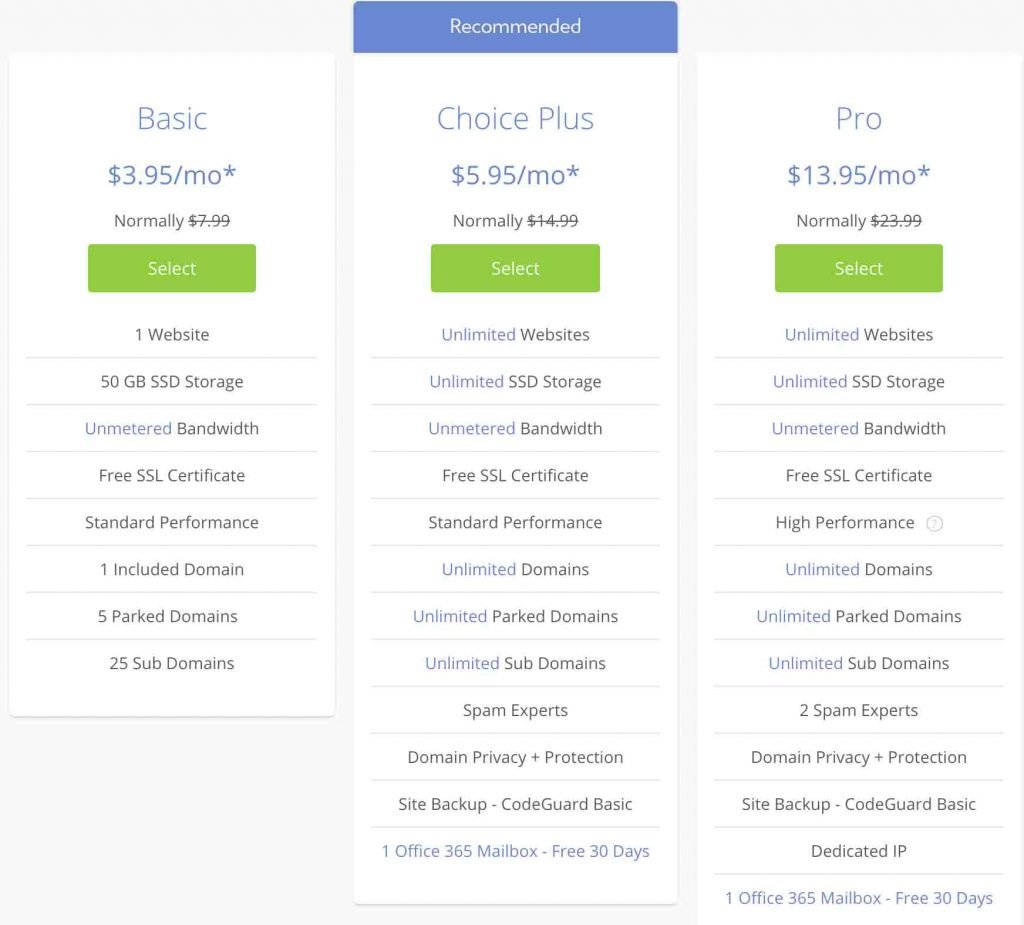
2. Select your plan, click select to choose your plan (if you just starting out go with the basic plan).
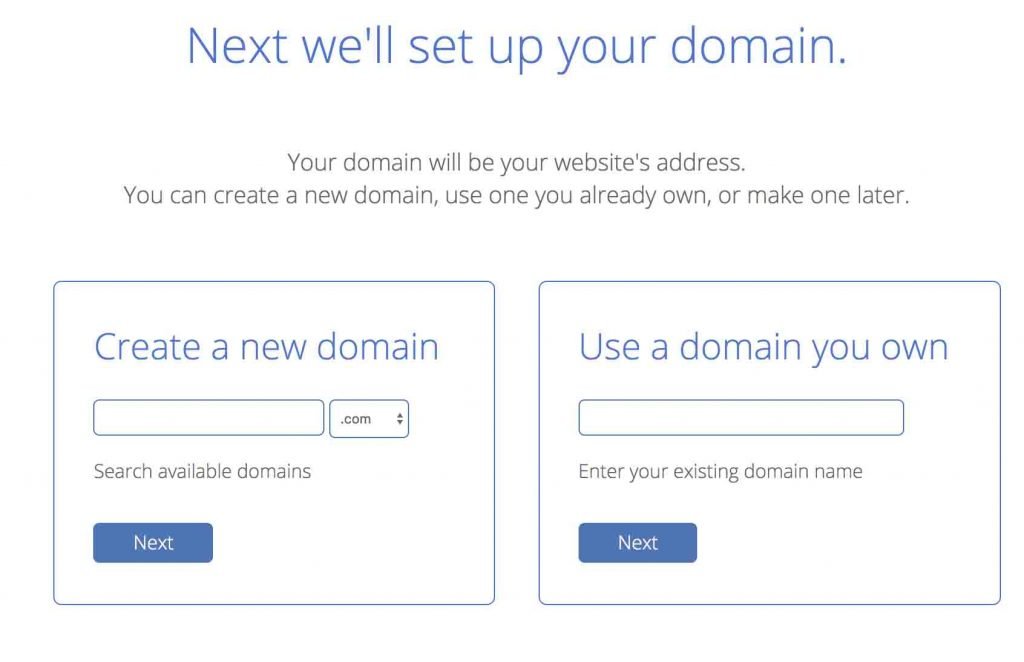
3. Enter your domain name and click next
On the next page there 2 textboxes, if you already have a domain and type it in the right textbox. If you are new and don’t have a domain name check the availability of it in the left textbox and then click next.
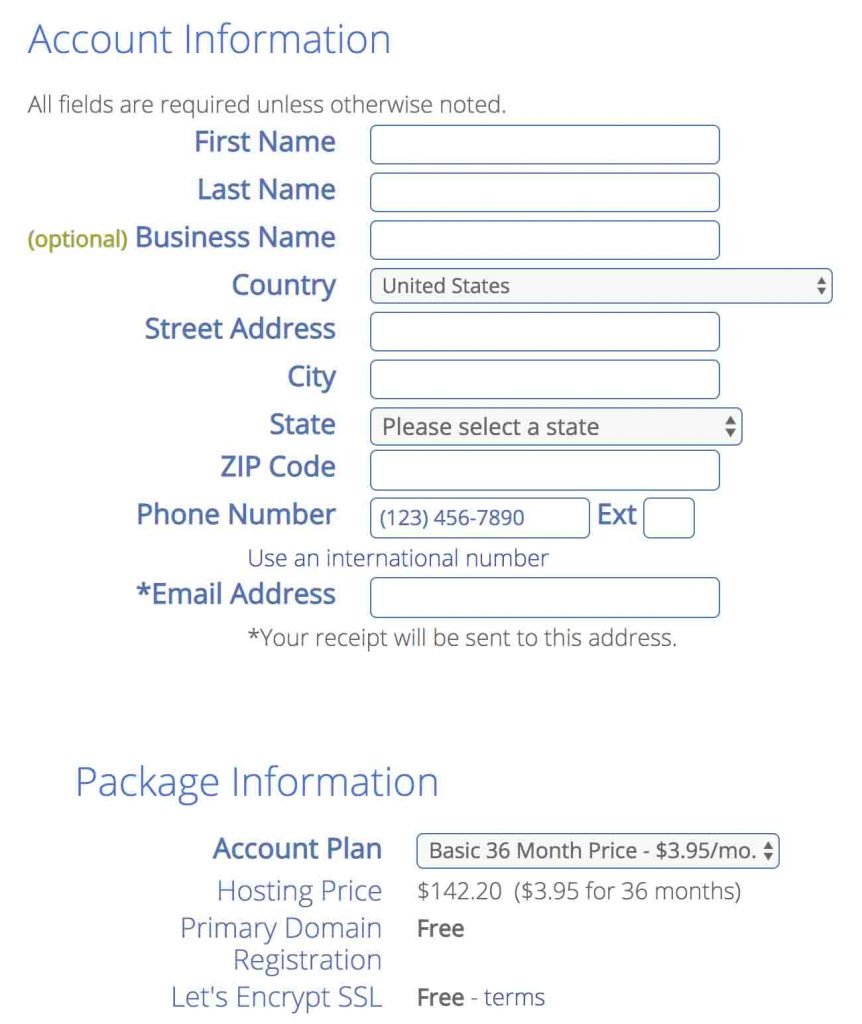
4. Complete the billing information
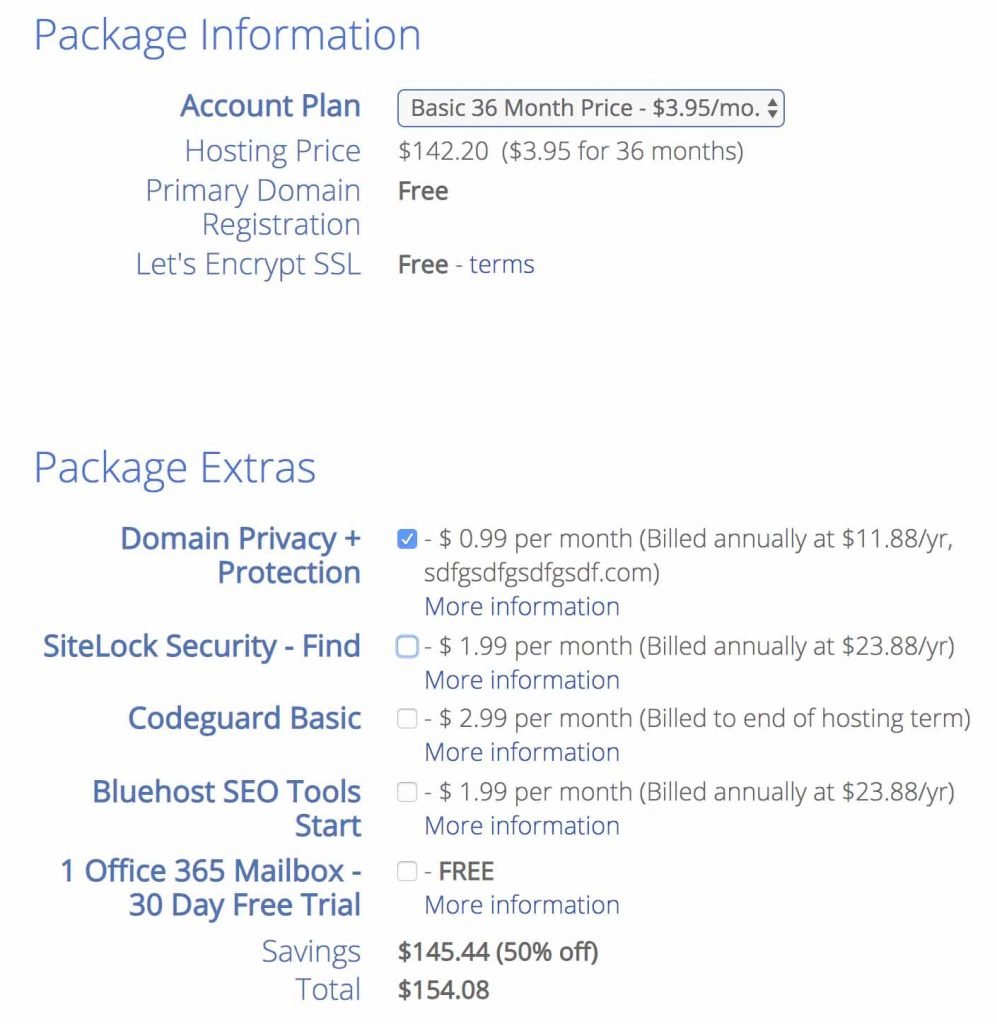
5. Select the right package and uncheck unnecessary options
Untick SiteLock Security and Codeguard which probably you don’t need, you can also get rid of domain privacy if you want it’s only $0.99/ month though.
With all of these packages, you’ll get a free domain name for the first year, the email account for your website (youname@yourdomainname.com), WordPress installation, and Webhosting.
If you think you’ll be creating more than one blog for the next 12 months it’s better to choose the recommended plan “Prime 36 Month Price” with unlimited websites. With this plan, you will get the lowest price for your hosting and that will be locked for three years.
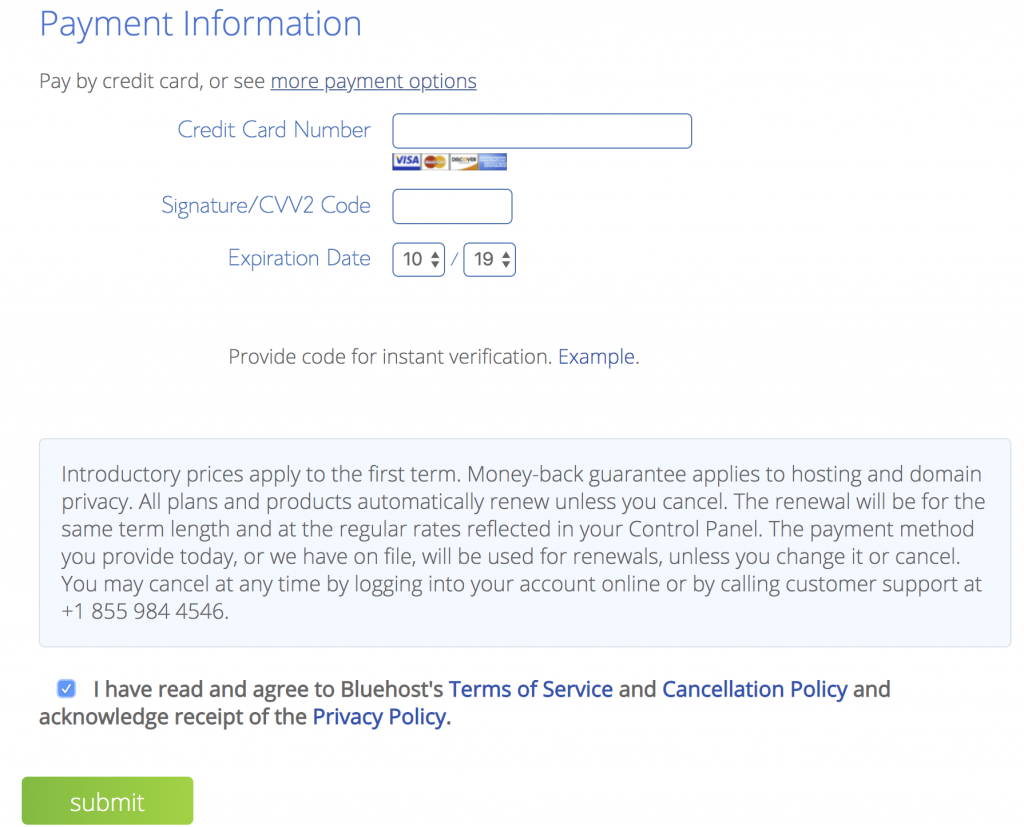
6. Enter your payments details, check the box for terms and conditions and submit
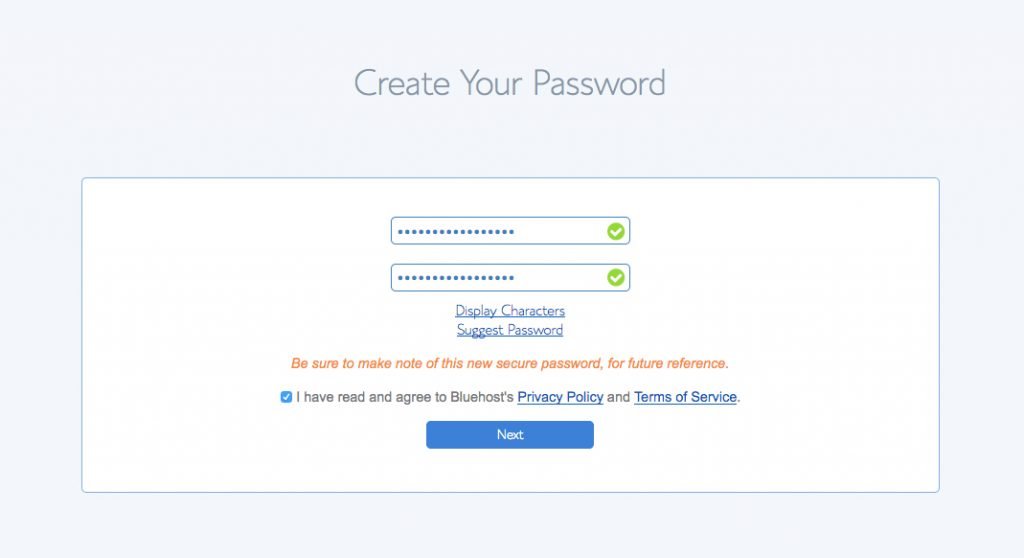
7.Create a secure password for your account
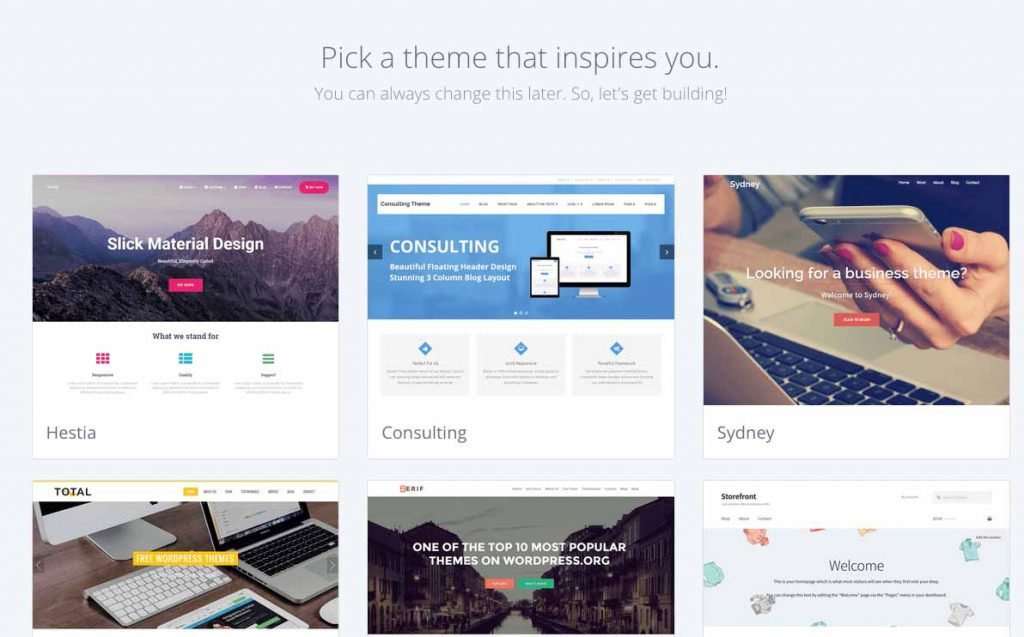
8. Choose a theme for your blog for now(you can change it later)
At this stage, your WordPress will be installed, once it is installed click on “Start Building” to log in to your account.
At this point, you will receive an email that contains your blog login details and these login details are different from the Bluehost account.
To log in, you need to go to https://yourdomainname.com/wp-admin/
Step 3. Design your blog
Now the fun part begins, after installing the WordPress and creating the password if you are not logged in already go back to bluehost.com and click the “Login” button at the top right corner of the screen. Put in the domain name and password information you should go to your WordPress dashboard.
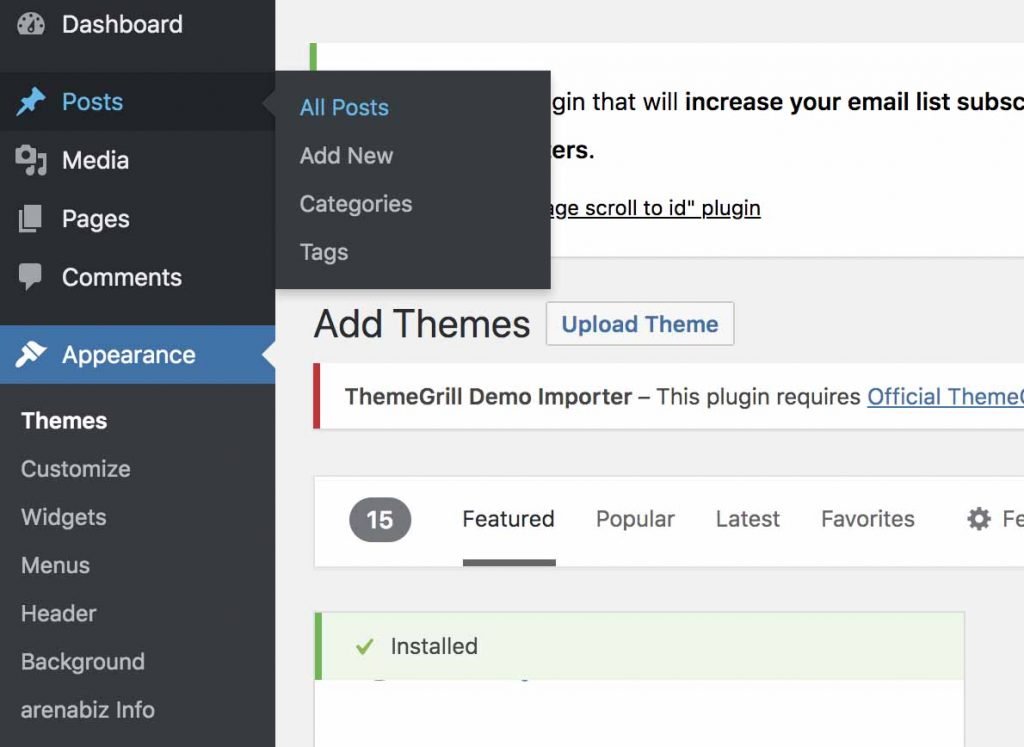
A theme is basically the “skin” of your blog, here is a list of the best themes you can use for your website. To change the theme, head over to “Appearance” > Themes which will take you to a page that looks like this:
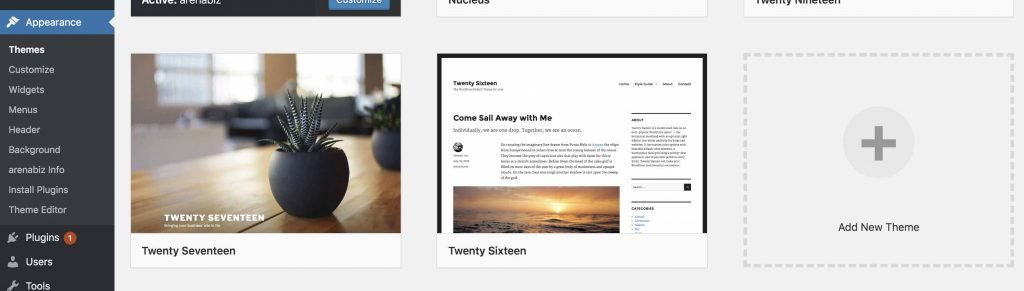
Click on “Add New Theme” which you can see with a “+” button on the page above and this will take you to a new page where you can select from thousands of free themes. Hover over to the one you like, the “Install” button becomes visible on that click install and activate the theme.
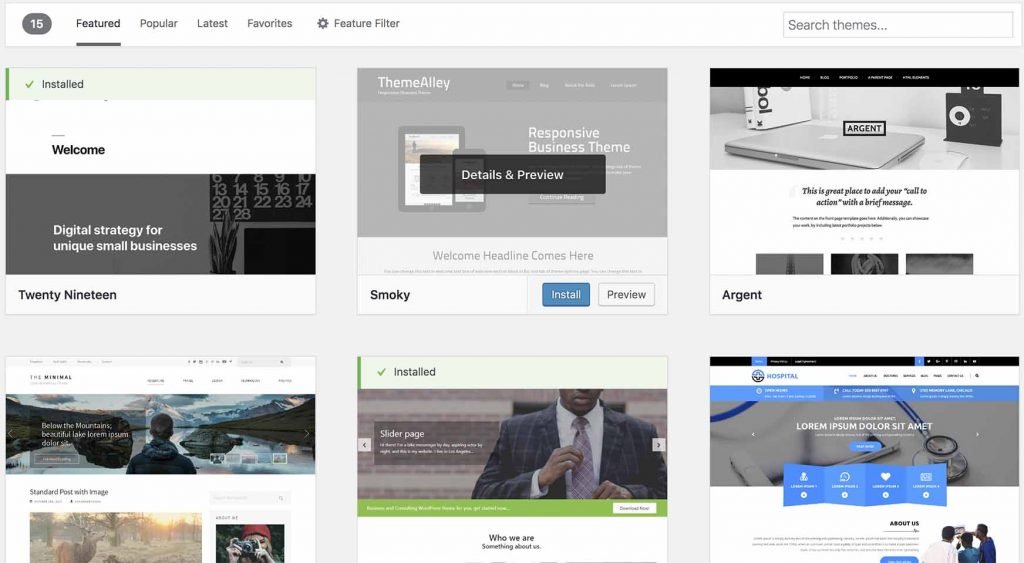
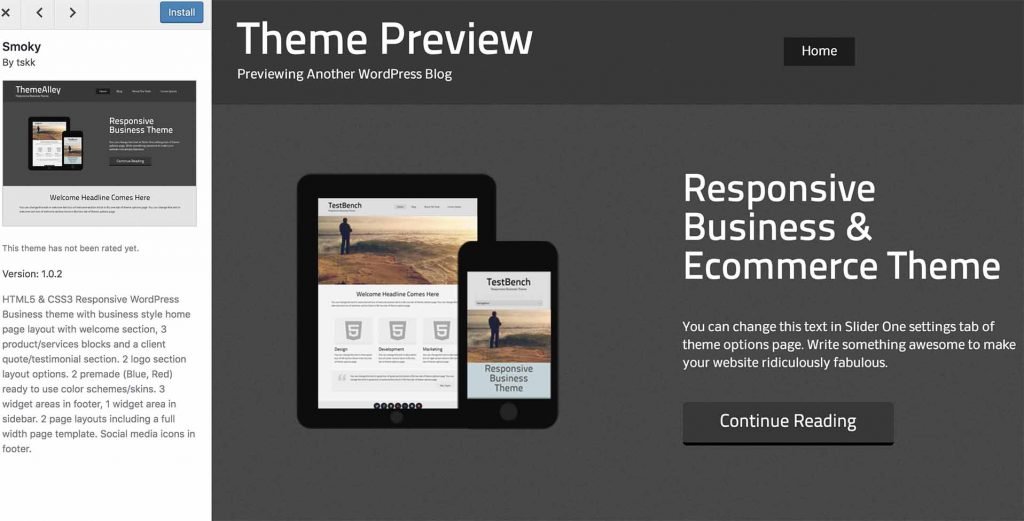
If you would like to see how the theme looks without installing it, just click “Preview” and you can see how a theme looks before installing it, like the picture below:
What Makes A Good Theme?
- It’s better to have a simple and plain theme.
- Make sure it is responsive(works smoothly on mobile).
- Choose a theme with a nice visual appearance not too busy though.
- Make sure it is a fast theme, test it on desktop and mobile to ensure it runs smoothly on both platforms.
Step 4. Write your first blog post and publish it
When you made it this far it means your website is up and running with your desired theme. Congratulations!
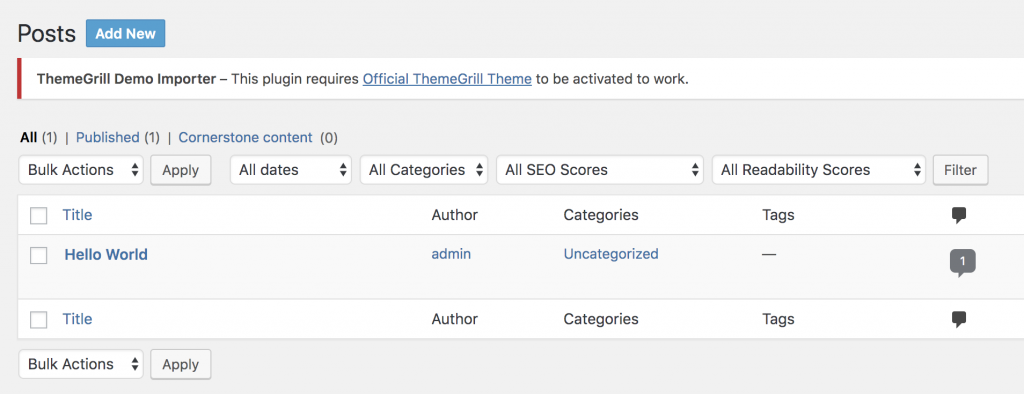
Now it is time to send some content to the world, to do that hover over “Posts” on your left menu and click on “All Posts”
In the new page, you can see there is a default post called “Hello World”, the is the default post that comes with every new WordPress blog., you can just select and delete it. To start writing your first blog post click on “Add New” which will take you to the new post editor page.
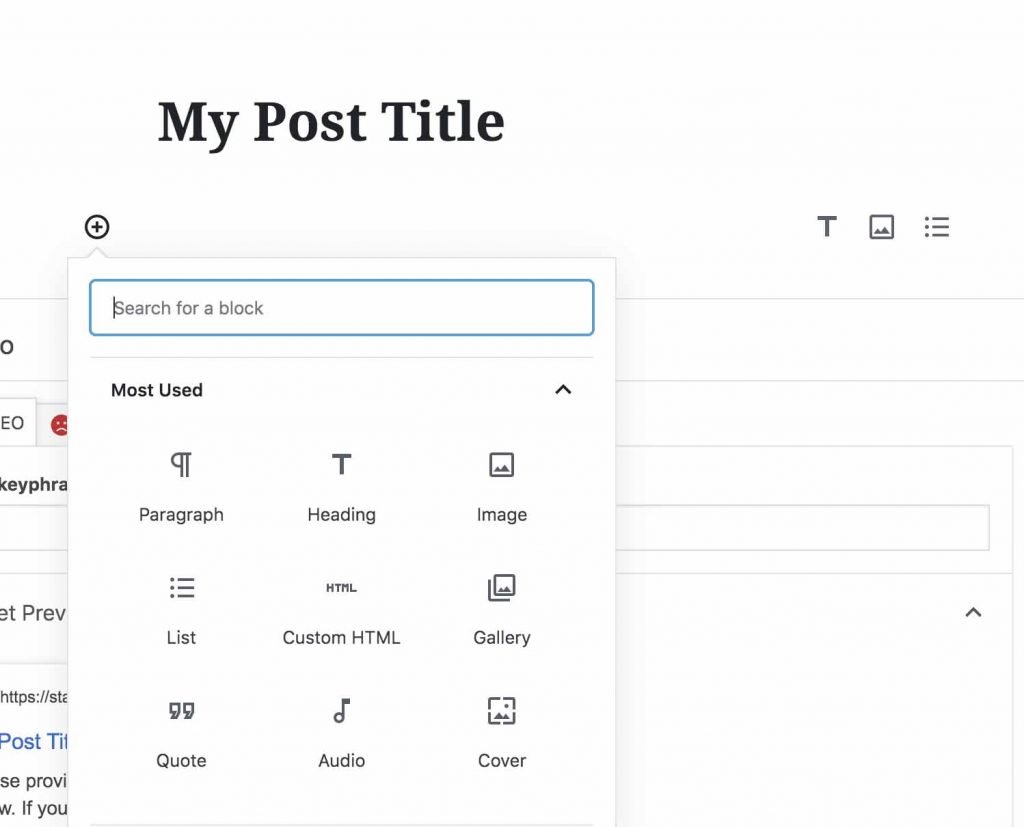
In the post editor page, you can type the title of your post and in the section below that, you can start writing your post. Each section is separated with a block so if you would like to add a new block(paragraph, Header, Image and etc) click to the “+” button and select the block you would like to add.
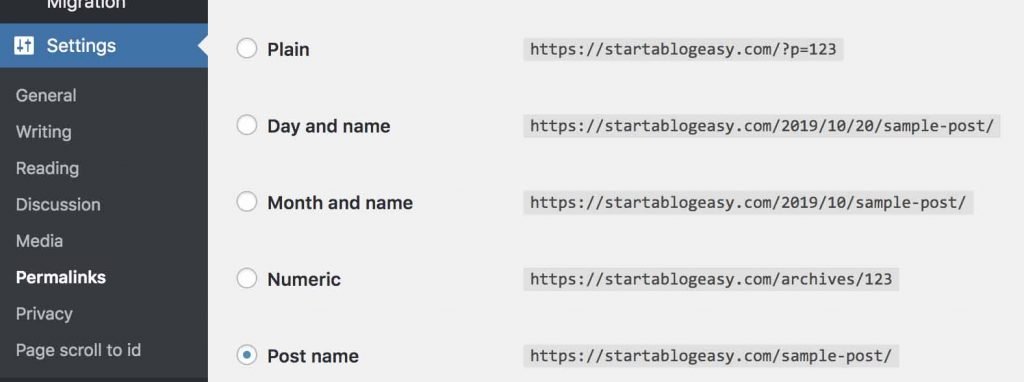
Change this before you publish
Before you publish your content it is better to make this minor change so that your published URL looks cleaner and more search engine friendly.
Head over to “Settings” and then click “Permalinks” in the new page you can see that the default URL is the day and name which looks pretty ugly, change that to post name. This will make your published URL way more readable and SEO friendly.
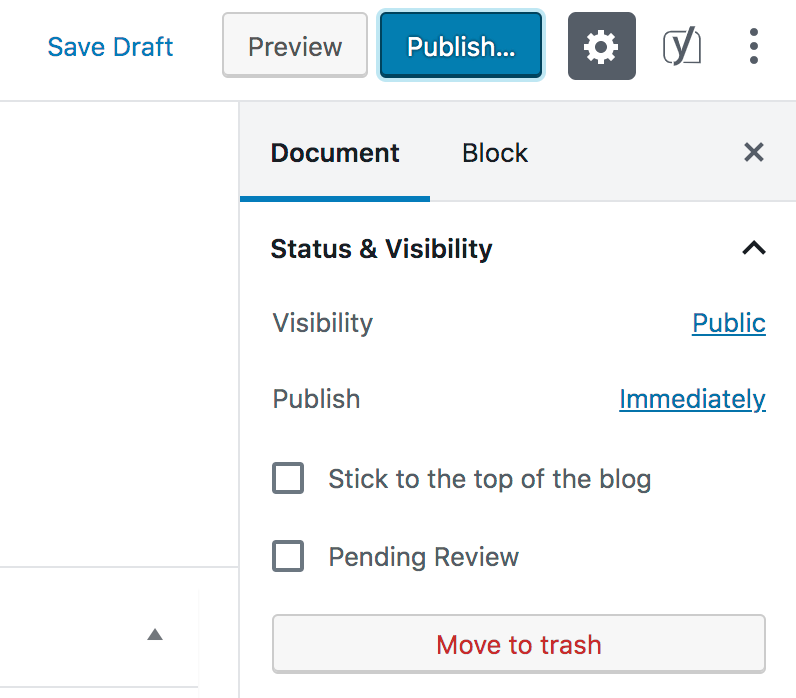
Publishing your first post
After you have finished writing your post all you need is to hit the blue”Publish…” button on the right side of the screen.
if you would like to save your work without publishing, for now, you can just hit “Save Draft” and then publish your works when it is ready.
Also if you would like to see how your content looks on the browser just hit “Preview” so that you can see how the layout looks in different browsers.
After publishing your first blog post, in order to view the actual content in a browser, you can either use the URL in the page address or hit the view page button.
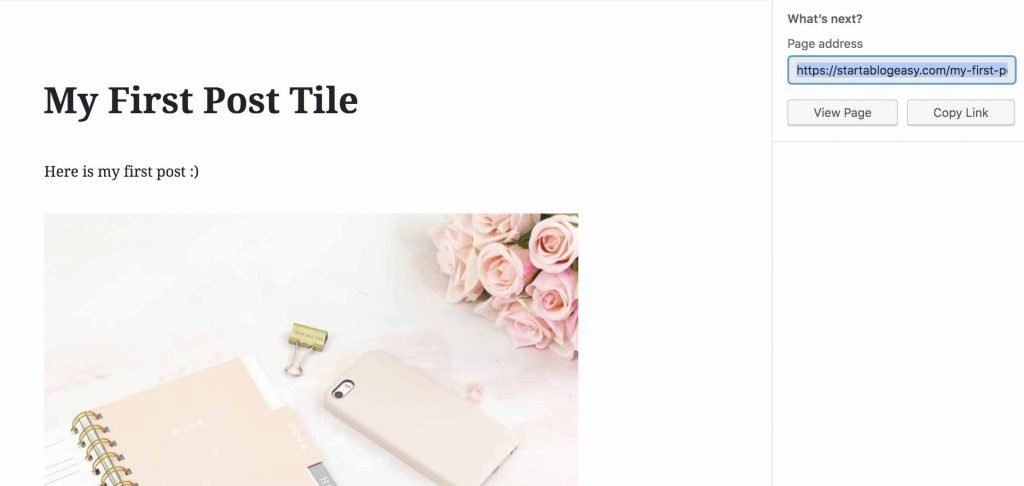
Congratulations you managed to create your first post on the internet.
Step 5. Drive traffic to your blog
Now you got your website up and running it’s time to get visitors to your blog. One of the best and fastest methods to get readers is through social media, Facebook, Instagram, Pinterest, Twitter, etc.
All you have to do is to share the URL of your website to one of the platforms above, you can find your website URL in the page address as we mentioned in step 4. But to get free targeted warm traffic, one of the best (if not the best) methods is through search engines especially Google. In order to get ranked on Google make sure to write decent unique content that gets enough monthly searches from google. You can check monthly search results for certain keywords through the Google keyword planner which is a free tool to use.
To get free traffic from Google you need to submit your website to Google so that Google can crawl and index your website. If Google finds your content valuable it will show your website in the search results and if you get to the first page you will be flooded by visitors.
Frequently Asked Questions
What is a blog?
Some people are still wondering what is a blog? The concept of a blog started back in 1994 and at the time it was not called a blog, it was just a personal homepage. The term “weblog” was coined in 1997, and it was shortened to “blog” by a programmer in 1999. Original blogs were linked from an archive or home page and were updated manually which was not very efficient.