Why You Should Submit Your Site To Google To Crawl?
If you are wondering how your website can appear on google and how to submit your URL to Google you have just come to the right place. Google has more than 80% of the search market. If you want free targeted traffic from Google you need to submit your website URL to this search engine so that Google can crawl and index your website. As a result, if your content is valuable and engaging you may end up being on the first page of Google and be flooded by free traffic and potentially money 😉
So you got your blog up and running and it is a time for people to find it. The best method to promote your blog are search engines, they provide warm, targeted traffic to your website and this is what you are looking for right! In order to enable search engines to find your content you need to submit it to search engines and here is how:
How to Submit URL To Google?
1. Head over to Google search console
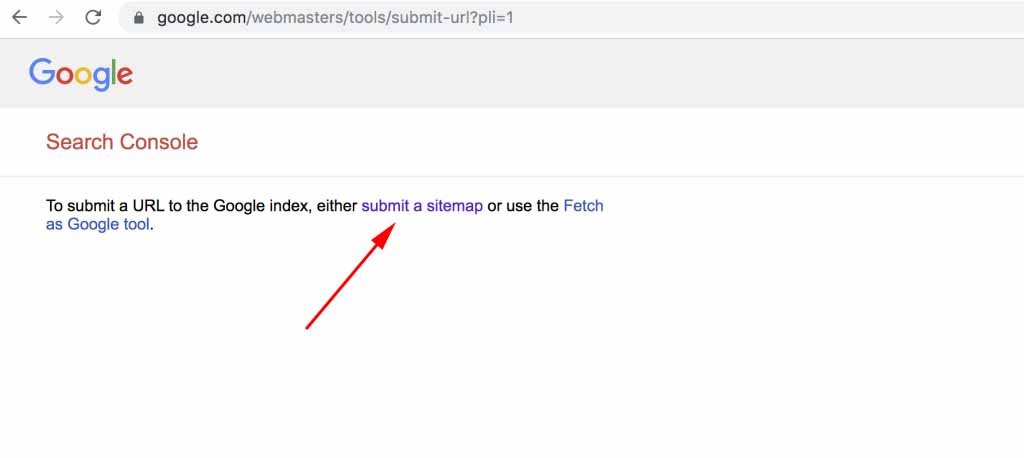
Click here for the Google search console. If you have not logged in or created one you may need to log in or create your Google account Click on “Submit a Sitemap”.
 alt=”test1″> alt=”test”>
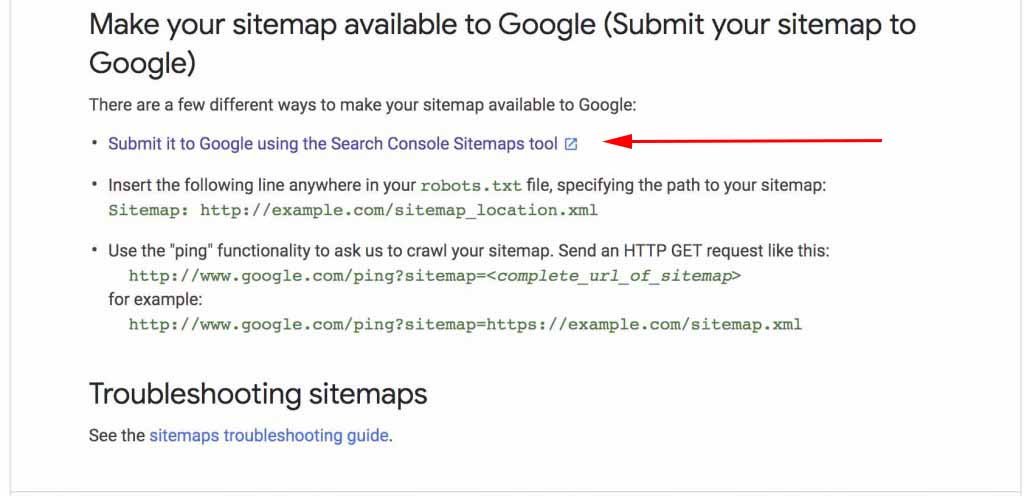
On the next page, scroll down a bit to where it says “Make your sitemap available to Google” and Click on “Submit it to Google using the Search Console Sitemaps tool”.
 alt=”test2″>
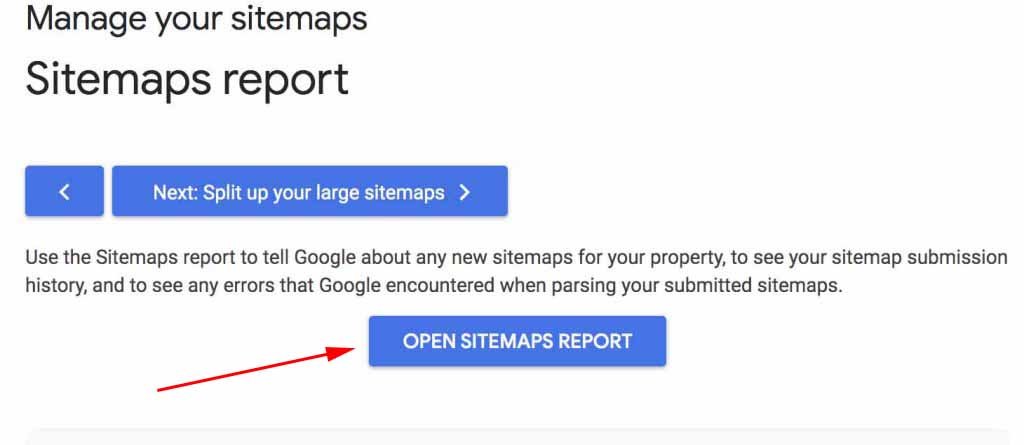
In the new page click on “OPEN SITEMAPS REPORTS “.
Before going to the next page you need to install an SEO plugin called “Yoast”.
Installing the Yoast SEO Plugin
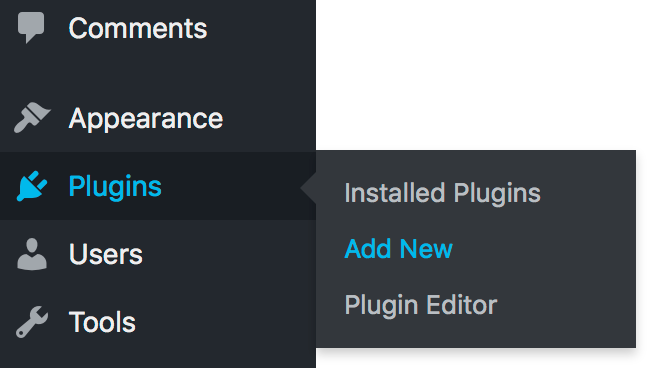
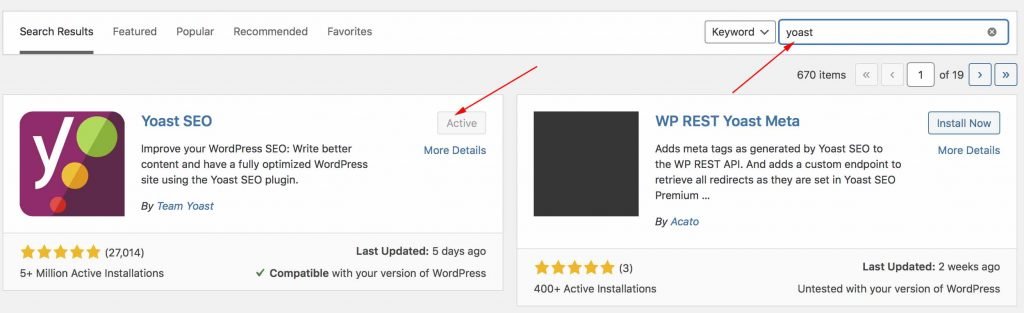
If you already have Yoast SEO plugin skip the installation part, if not you need to install “Yoast”. Yoast is one of the best plugins to simplify the optimization of your website. To install, head over to the “plugins” section of your website and click “Add”.
Search for “Yoast” in the search bar, after finding the plugin Click “Install Now” button and activate the plugin. The plugin should be in an active state like below.
After activating Yoast a new item will be added to your WordPress admin menu called “SEO”.
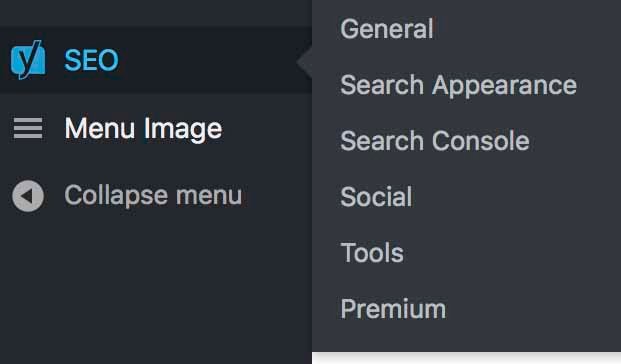
Click on “General” form the SEO menu and on the setting page, you’ll see the “Webmaster Tools” tab. This is the section that we are going to use to connect WordPress to Google search console.
3. Connecting WordPress to Google search console
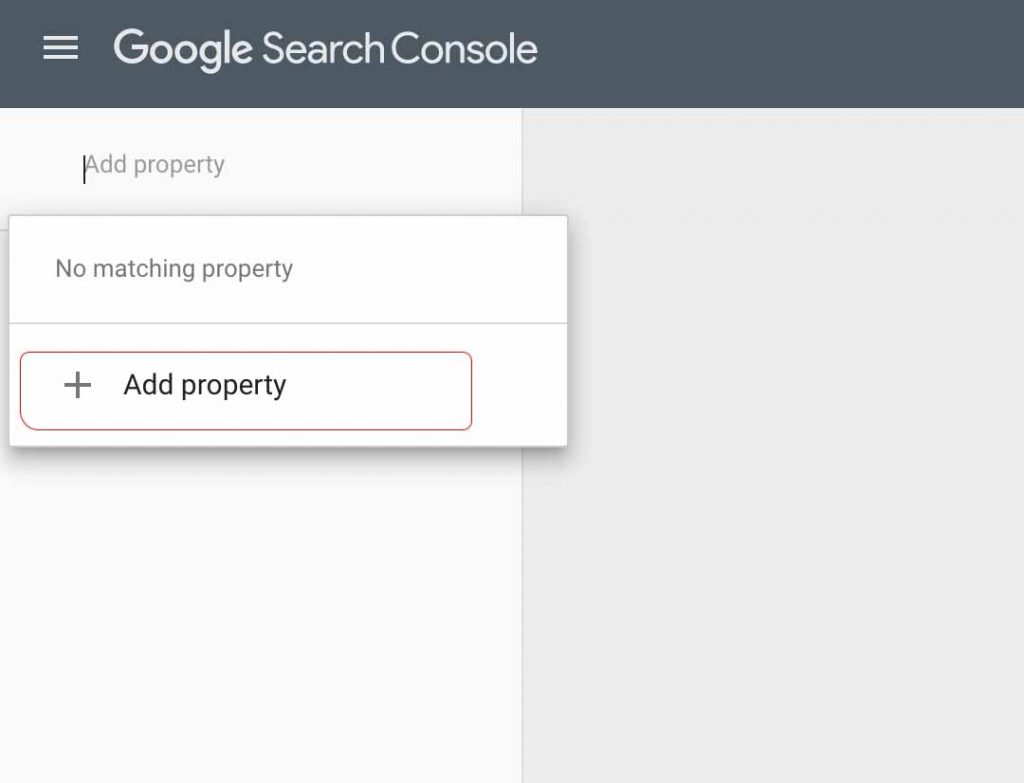
After installing Yoast SEO, it is time to add your website to the Google search console. Go back to search console and click on “Add Property” and from the menu click on “+ Add Property”
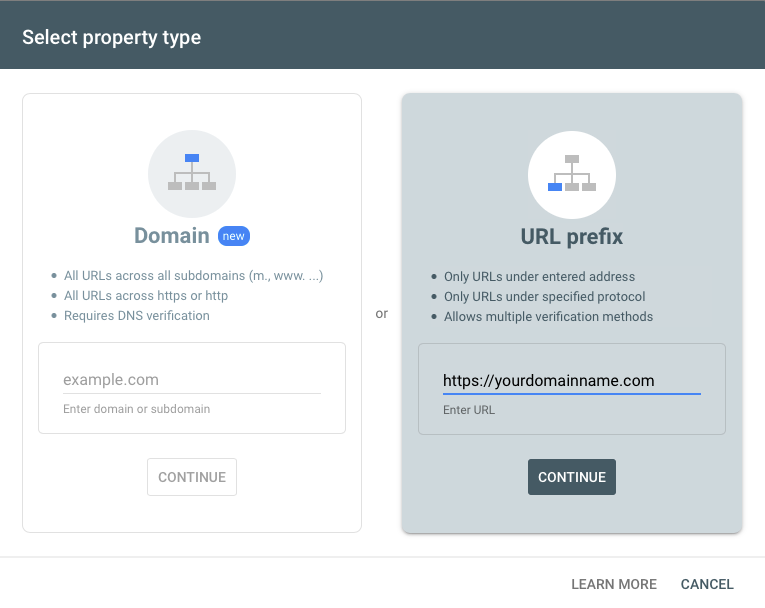
On the next page, you have two options. Put in your domain name in the right textbox and make sure to put “HTTPS://” or “HTTP” before your domain name, if you use blue host you should be https. Click “Continue”!
After adding your website URL you need to verify that you are the owner of the website through the verification page. There are few methods to verify your website, but the easiest way is through “HTML tag”. Expand the tab with the “Html tag” title, and copy the value inside content(don’t need to copy double quotations).
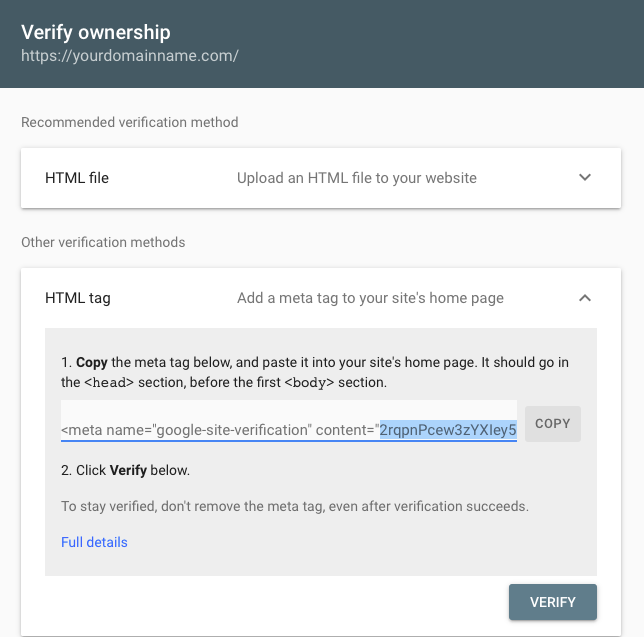
Go back to the WordPress dashboard and go to the SEO » General section. In the “Webmaster Tools” tab paste the value in the “Google verification code” field.

Click on the “Save Changes” button and go back to Google search console and hit verify. You have now successfully verified your website. If you had any issue verifying your website make sure to clear the WordPress cache.
4. Setting up sitemaps
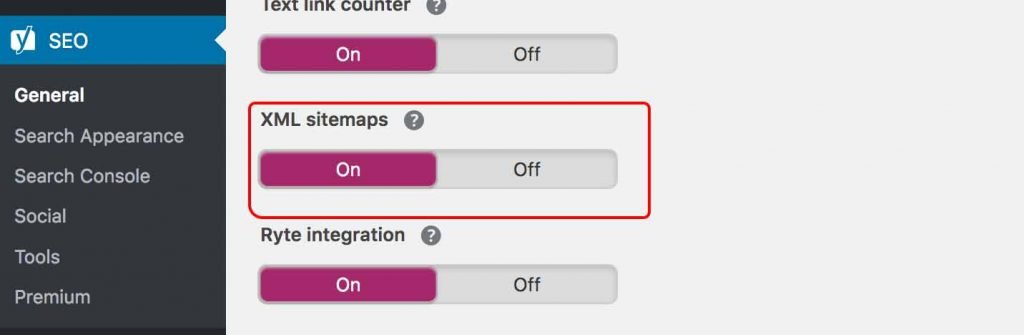
After verifying your site you need to turn on the XML sitemaps features. Go back to the SEO » General section and click on the features tab. Scroll down a bit to the “XML sitemaps” and turn it on in case it is off and click on “Save Changes”.
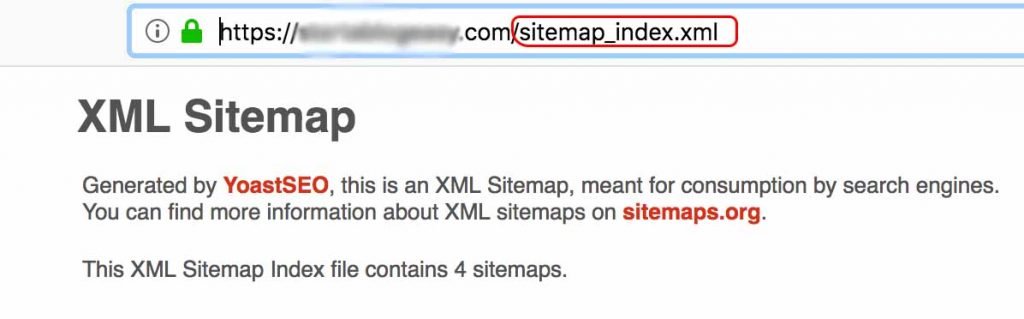
In order to see website sitemaps simply click on the question mart icon. This will show you the link that will take you to the XML sitemap URL.

This is normally how a sitemap URL looks like.
5. Submit XML sitemap to Google
Go back to the Google search console and select your website. From the left side of the screen select “Sitemaps”.
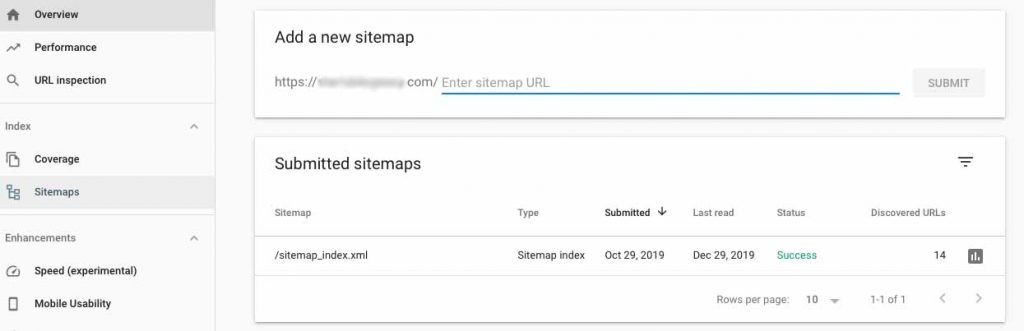
Next, you need to enter your main site map URL that you can see in the previous step, it normally looks like this “sitemap_index.xml”, enter the sitemap and click submit. Your main sitemap is connected to other sitemaps on your website. This will allow Google to crawl all the other sitemaps on your website.
It will take a few days for google to start crawling your website, but once it crawled and indexed the website you can see reposts in the Google search console.